

Push notifications are more than just messages sent to a user's device. They're a direct channel of communication between your app and your users, capable of driving engagement, retention, and even revenue when used effectively.
Types of Push Notifications
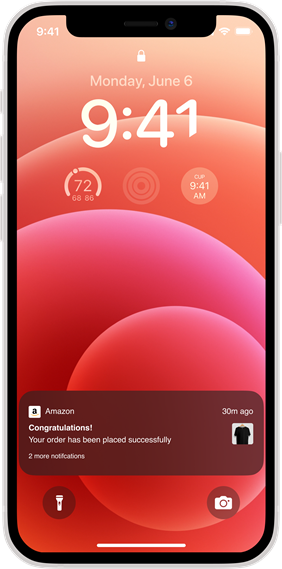
1. Transactional: Order confirmations, delivery updates, etc.
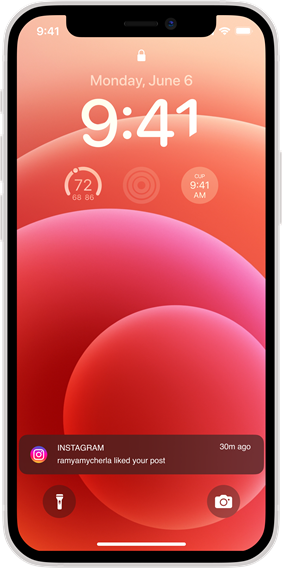
2. Engagement: New content alerts, social interactions, etc.
3. Promotional: Special offers, discounts, etc.
4. Behavioral: Reminders based on user actions or inactions.
Understanding these types will help you tailor your notification strategy to your app's specific needs and user expectations.
Setting Up Push Notifications
While we'll be using the react-native-push-notification library, it's crucial to understand the underlying mechanisms.
iOS: Apple Push Notification Service (APNs)
APNs use a certificate-based system for authentication. Here's a step-by-step process:
- Generate a Certificate Signing Request (CSR) using Keychain Access on your Mac.
- Create an App ID in the Apple Developer Portal.
- Create a push notification SSL certificate.
- Download and install the certificate.
- Export the certificate as a .p12 file.
This process can be tricky, so here's a pro tip: Use authentication keys instead of certificates. They're easier to manage and don't expire. With authentication keys, the process is simplified. You only need one key (.p8 file) for your entire developer account, and this key can be used across multiple apps and environments. You no longer have to deal with separate files for development and production.
Suggested Reads- How to Create, export and import components in React Native
Android: Firebase Cloud Messaging (FCM)
FCM setup involves:
- Creating a Firebase project.
- Adding your app to the project.
- Downloading the google-services.json file.
- Configuring your app's build.gradle files.
A common pitfall here is forgetting to add the google-services.json file to the correct directory. Always double-check this!
Getting User Permission
Partner with Us for Success
Experience seamless collaboration and exceptional results.
Always request notification permissions to respect user privacy and build trust. Properly timed permission requests lead to higher opt-in rates and better user engagement.
import { Alert, Platform } from 'react-native';
import PushNotification from 'react-native-push-notification';
import { request, PERMISSIONS, RESULTS } from 'react-native-permissions';

const requestNotificationPermission = async () => {
try {
if (Platform.OS === 'ios') {
// For iOS
const result = await request(PERMISSIONS.IOS.NOTIFICATIONS);
handlePermissionResult(result);
} else if (Platform.OS === 'android') {
// For Android 13 and above
const result = await request(PERMISSIONS.ANDROID.POST_NOTIFICATIONS);
handlePermissionResult(result);
}
} catch (error) {
console.error('Permission Request Error:', error);
}
};

const handlePermissionResult = (result) => {
switch (result) {
case RESULTS.UNAVAILABLE:
Alert.alert('Permission unavailable', 'Notifications are not supported on this device.');
break;
case RESULTS.DENIED:
Alert.alert('Permission denied', 'Please enable notifications in your device settings.');
break;
case RESULTS.LIMITED:
Alert.alert('Permission limited', 'Notification permissions are limited.');
break;
case RESULTS.GRANTED:
console.log('Notification permissions granted.');
break;
case RESULTS.BLOCKED:
Alert.alert('Permission blocked', 'Notifications are blocked. Go to settings to enable.');
break;
}
};
// Call this function to request permission
requestNotificationPermission();
Implementing Push Notifications: Advanced Techniques
Handling Notification Channels (Android 8.0+)
For Android 8.0 and above, you need to implement notification channels. Here's how:
PushNotification.createChannel(
  {
    channelId: "default-channel-id", // (required)
    channelName: `Default channel`, // (required)
    channelDescription: "A default channel", // (optional) default: undefined.
    soundName: "default", // (optional) See `soundName` parameter of `localNotification` function
    importance: 4, // (optional) default: 4. Int value of the Android notification importance
    vibrate: true, // (optional) default: true. Creates the default vibration patten if true.
  },
  (created) => console.log(`createChannel returned '${created}'`) // (optional) callback returns whether the channel was created, false means it already existed.
);
Rich Notifications
Go beyond simple text notifications by including images, buttons, or even custom layouts:
PushNotification.localNotification({
  title: "My Rich Notification",
  message: "Check out this image!",
  bigPictureUrl: "https://example.com/large-image.jpg", // Android only
  largeIconUrl: "https://example.com/icon.png", // Android only
  bigText: "Here's some more detailed text that will be displayed when the notification is expanded.", // Android only
});
Silent Notifications
Sometimes, you need to update your app without alerting the user. Use silent notifications for this:
PushNotification.localNotification({
  title: null,
  message: null,
  userInfo: {
    silent: true,
    data: { /* your data here */ }
  }
});
Real-World Scenarios and Solutions
Scenario 1: E-commerce App
For an e-commerce app, you might want to send notifications about order status, abandoned carts, and personalized offers. Here's how you might handle an order status update:
PushNotification.localNotification({
  title: "Order Status Update",
  message: `Your order #${orderId} has been shipped!`,
  userInfo: { orderId: orderId },
});

// In your notification handler:
onNotification: function(notification) {
  if (notification.userInfo.orderId) {
    // Navigate to order details screen
    navigation.navigate('OrderDetails', { orderId: notification.userInfo.orderId });
  }
}
Scenario 2: Social Media App
For a social media app, you might want to notify users about new followers, likes, or comments. Here's how you could handle a new follower notification:
PushNotification.localNotification({
  title: "New Follower",
  message: `${newFollowerName} started following you!`,
  userInfo: { followerId: followerId },
});

// In your notification handler:
onNotification: function(notification) {
  if (notification.userInfo.followerId) {
    // Navigate to follower's profile
    navigation.navigate('UserProfile', { userId: notification.userInfo.followerId });
  }
}
Best Practices and Common Pitfalls
- Respect User Preferences: Always provide clear opt-out options and honor user preferences.
- Timing is Everything: Use analytics to determine the best times to send notifications to your specific user base.
- Personalization: Leverage user data to send highly relevant notifications. A personalized notification is much more likely to be acted upon.
- A/B Testing: Continuously test different notification strategies to optimize engagement.
- Error Handling: Always implement robust error handling. For example:
PushNotification.configure({
  // ... other configuration
  onRegistrationError: function(err) {
    console.error(err.message, err);
  },
  onNotification: function(notification) {
    console.log("NOTIFICATION:", notification);

    // Handle any errors in your notification processing
    try {
      // Process the notification
    } catch (error) {
      console.error("Error processing notification:", error);
    }

    notification.finish(PushNotificationIOS.FetchResult.NoData);
  },
});- Battery Drain: Be mindful of the frequency of your notifications and their impact on battery life. Overuse of location-based notifications, for instance, can significantly drain a device's battery.
- Deep Linking: Implement deep linking to provide a seamless user experience. When a user taps on a notification, they should be taken directly to the relevant content within your app.
export default function App() {
const linking = {
prefixes: ['myapp://'], // Add your custom scheme here
config: {
screens: {
Home: '',
Details: 'details/:itemId',
},
},
};

return (
<NavigationContainer linking={linking}>
<Stack.Navigator initialRouteName="Home">
<Stack.Screen name="Home" component={HomeScreen} />
<Stack.Screen name="Details" component={DetailsScreen} />
</Stack.Navigator>
</NavigationContainer>
);
}
Measuring Success: Analytics and Metrics
To truly master push notifications in React Native, you need to measure their effectiveness. Key metrics to track include:
- Delivery Rate: How many of your sent notifications are actually delivered?
- Open Rate: What percentage of delivered notifications are opened?
- Conversion Rate: How many users take the desired action after opening a notification?
- Opt-Out Rate: How many users are disabling notifications?
Partner with Us for Success
Experience seamless collaboration and exceptional results.
Consider integrating an analytics solution to track these metrics and continually refine your notification strategy.
Future of Push Notifications
As we look to the future, React Native push notifications are likely to become even more sophisticated. Some trends to watch out for include:
- AI-driven personalization
- Interactive notifications with more complex actions
- Integration with wearable devices
- Augmented reality notifications
Staying ahead of these trends will help you create more engaging and effective notification strategies for your React Native apps.
Suggested Reads- 10 Mistakes to Avoid When Developing React Native Apps
Conclusion
Mastering push notifications in React Native is crucial for creating engaging mobile applications. At F22 Labs, we specialize in developing React Native apps with advanced notification strategies. Our expert team can help you implement sophisticated notification systems, integrate analytics, and stay ahead of emerging technologies.
If you're looking to enhance your app's user engagement through effective push notifications, consider reaching out to React Native Developers at F22 Labs. Let us help you transform your push notifications into powerful tools for user retention and business growth.
FAQ's
How to do push notifications in React Native?
Use a library like react-native-push-notification. Set up FCM/APNs, configure the library, request permissions, then send local notifications or handle remote ones from a server.
How does FCM work?
FCM maintains a connection between the app and the server. It routes messages to target devices, handling queueing and delivery, even when devices are offline.
How do notifications work in React Native?
Apps register with device notification services. They can send local notifications or receive remote ones, which are displayed to users and can trigger in-app actions.


Murtuza Kutub
A product development and growth expert, helping founders and startups build and grow their products at lightning speed with a track record of success. Apart from work, I love to Network & Travel.


